00. Anlage Gesamtansicht - Bild 1
|

00. Anlage Gesamtansicht - Bild 2
|

00. Anlage Gesamtansicht - Bild 3
|

00. Anlage Gesamtansicht - Bild 4
|

00. Anlage Gesamtansicht - Bild 5
|

00. Anlage Gesamtansicht - Bild 6
|

01.01 Annahmedosierer - Bild 1
|

01.01 Annahmedosierer - Bild 2
|

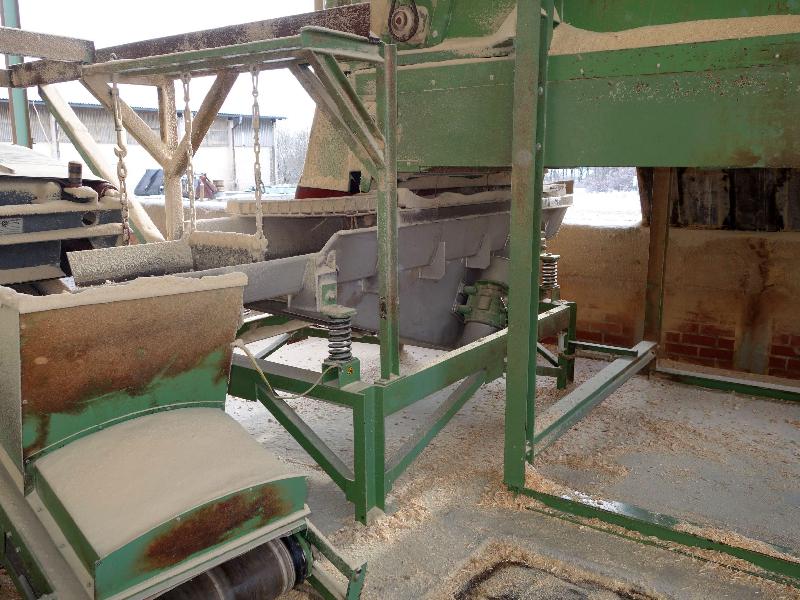
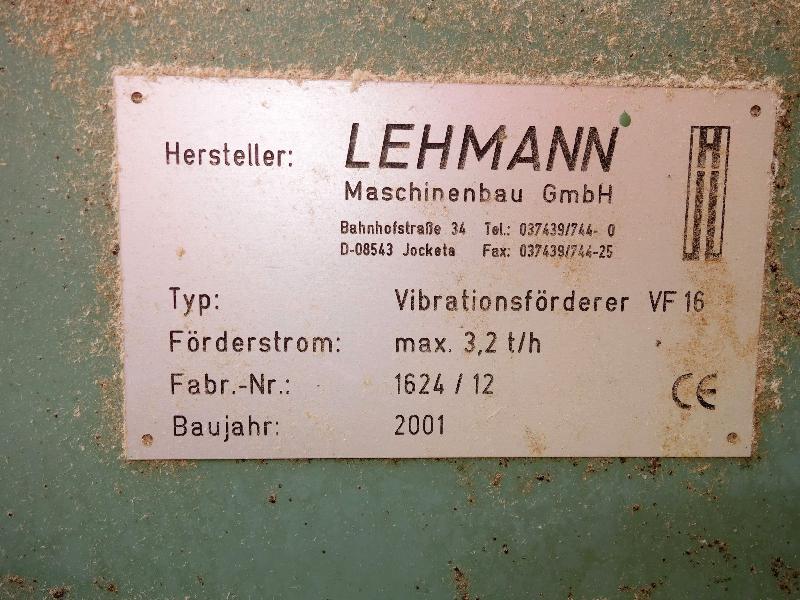
01.02 Vibrationsfoerderer - Bild 1
|

01.02 Vibrationsfoerderer - Bild 2
|

01.02 Vibrationsfoerderer - Bild 3
|

01.02 Vibrationsfoerderer - Bild 4
|

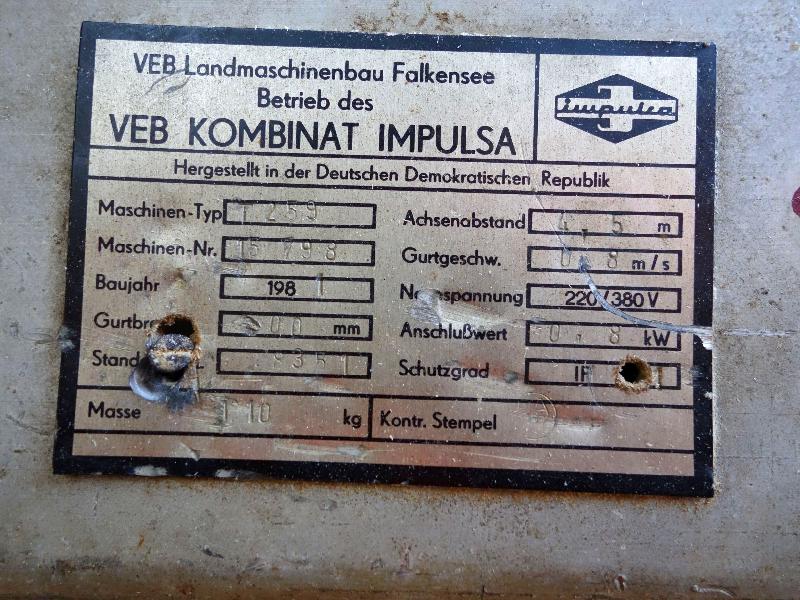
01.03 Ueberbandmagnet - Bild 1
|

01.03 Ueberbandmagnet - Bild 2
|

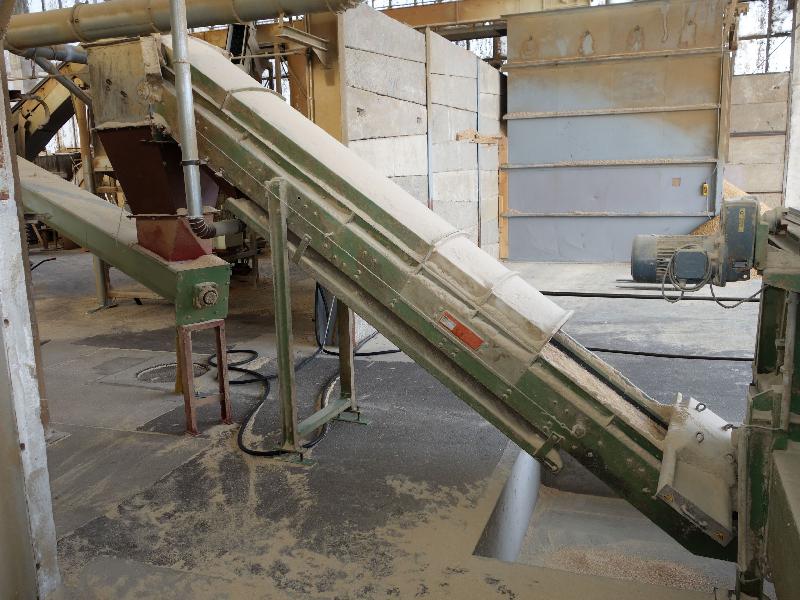
01.04 Foerderband - Bild 1
|

01.04 Foerderband - Bild 2
|

01.04 Foerderband - Bild 3
|

01.05 Permanentmagnet - Bild 1
|

01.05 Permanentmagnet - Bild 2
|

01.06-1 Hammermuehle 1 - Bild 1
|

01.06-1 Hammermuehle 1 - Bild 2
|

01.06-1 Hammermuehle 1 - Bild 3
|

01.06-2 Hammermuehle 2 - Bild 1
|

01.06-2 Hammermuehle 2 - Bild 2
|

01.06-2 Hammermuehle 2 - Bild 3
|

01.06-2 Hammermuehle 2 - Bild 4
|

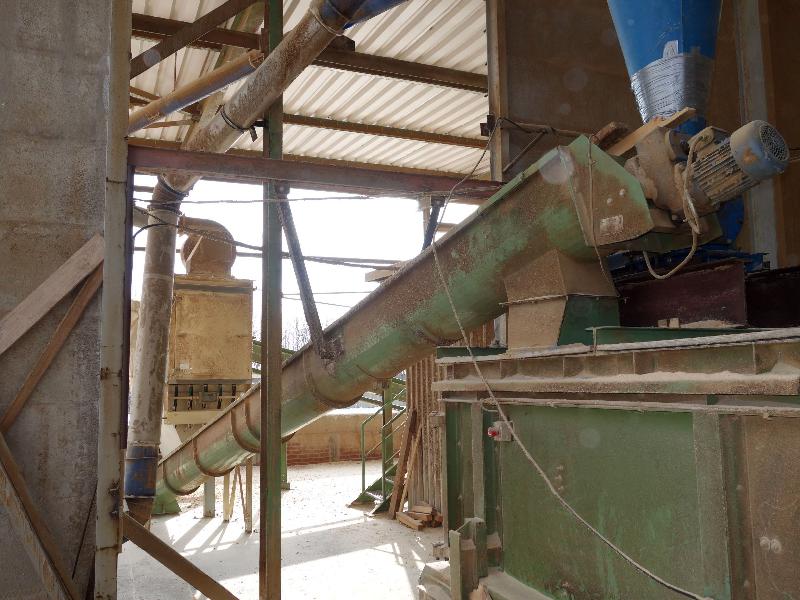
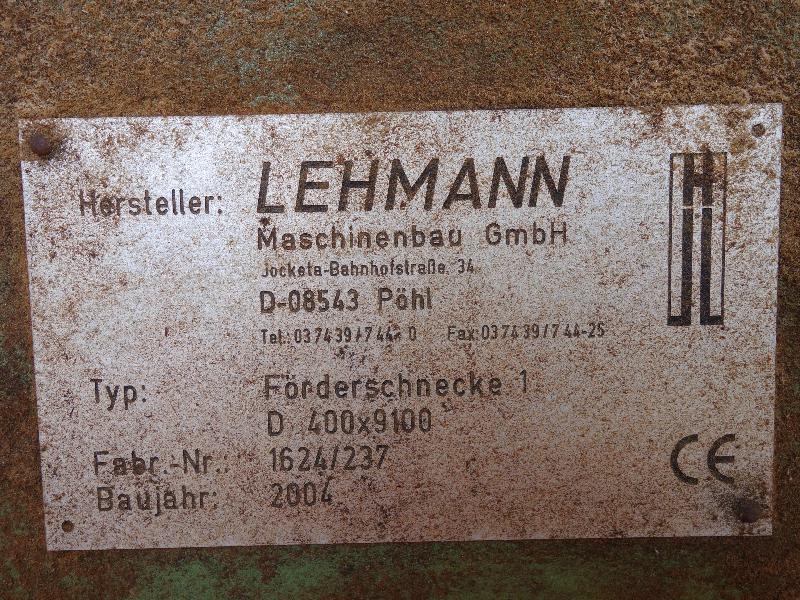
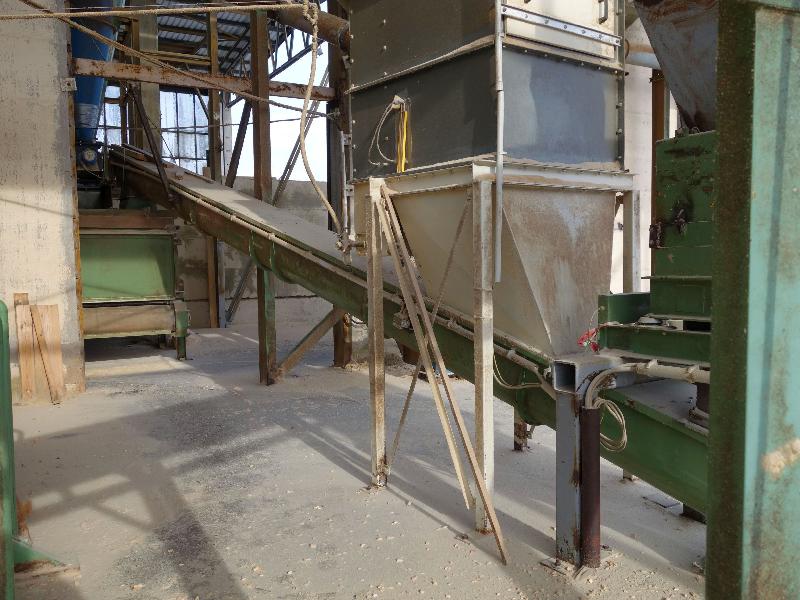
01.07 Foerderschnecke - Bild 1
|

01.07 Foerderschnecke - Bild 2
|

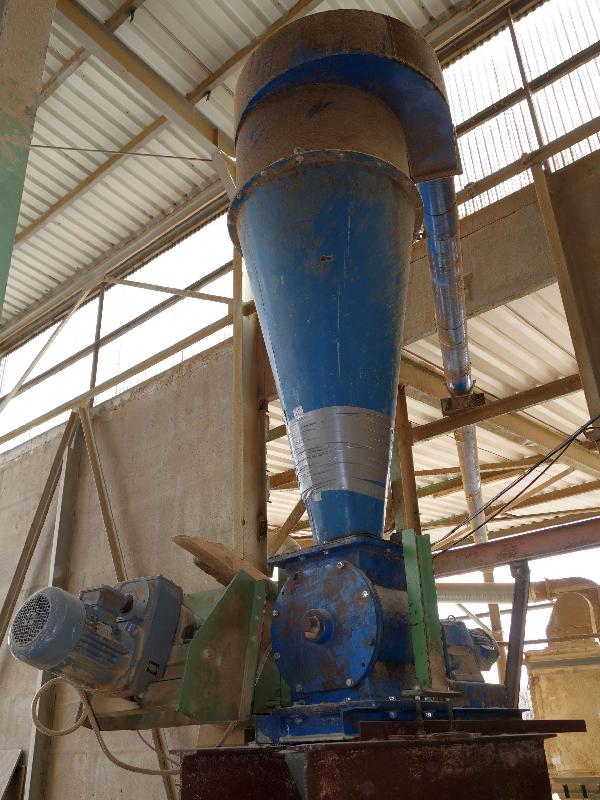
01.08 Zyklon zur Entstaubung - Bild 1
|

01.08 Zyklon zur Entstaubung - Bild 2
|

01.09 Ventilator fuer Spaenetransport - Bild 1
|

01.09 Ventilator fuer Spaenetransport - Bild 2
|

01.09 Ventilator fuer Spaenetransport - Bild 3
|

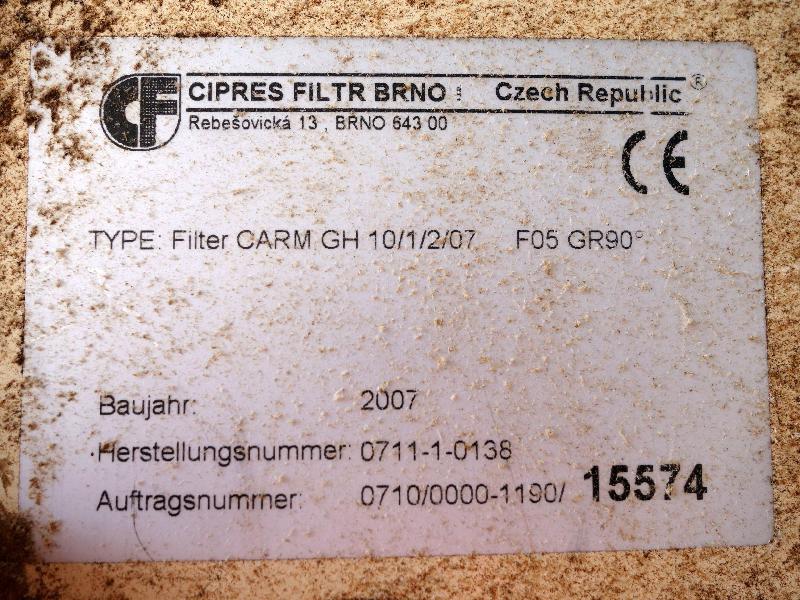
01.10 Sackfilter zur Entstaubung - Bild 1
|

01.10 Sackfilter zur Entstaubung - Bild 2
|

01.10 Sackfilter zur Entstaubung - Bild 3
|

01.10 Sackfilter zur Entstaubung - Bild 4
|

01.11 Ventilator
|

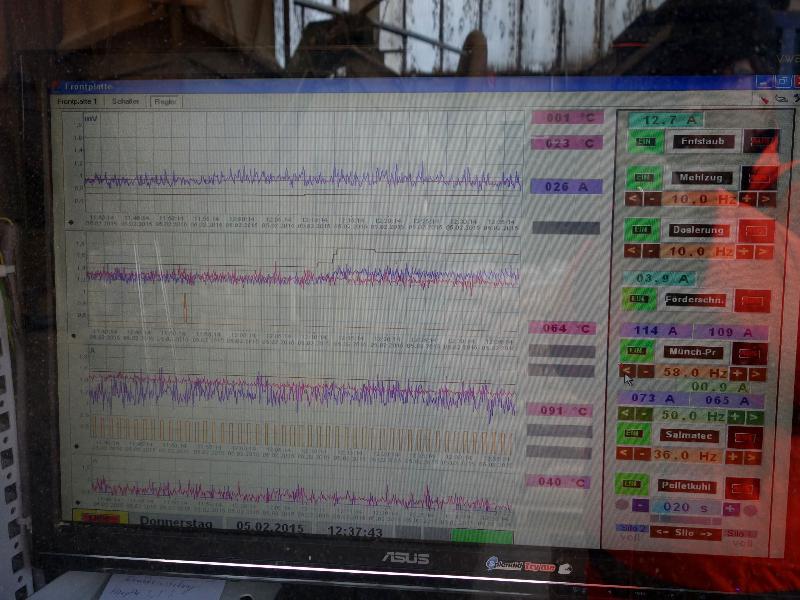
01.xx Anlagensteuerung - Bild 1
|

01.xx Anlagensteuerung - Bild 2
|

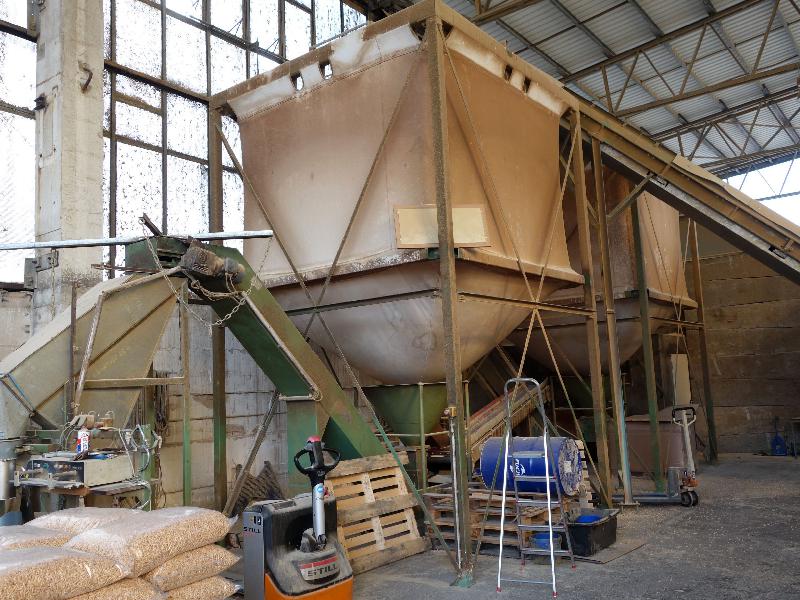
02.01 Dosierbunker - Bild 1
|

02.01 Dosierbunker - Bild 2
|

02.02 Foerderband - Bild 1
|

02.02 Foerderband - Bild 2
|

02.02 Foerderband - Bild 3
|

02.03 Permanentmagnet
|

02.04 Foerderschnecke
|

02.05 Foerderschnecke
|

02.06 Dosierung Additive - Bild 1
|

02.06 Dosierung Additive - Bild 2
|

02.06 Dosierung Additive - Bild 3
|

02.07 Foerderschnecke
|

02.08-1 Pelletpresse 1 - Bild 1
|

02.08-1 Pelletpresse 1 - Bild 2
|

02.08-1 Pelletpresse 1 - Bild 3
|

02.08-1 Pelletpresse 1 - Bild 4
|

02.08-1 Pelletpresse 1 - Bild 5
|

02.08-2 Pelletpresse 2 - Bild 1
|

02.08-2 Pelletpresse 2 - Bild 2
|

02.08-2 Pelletpresse 2 - Bild 3
|

02.08-2 Pelletpresse 2 - Bild 4
|

02.08-2 Pelletpresse 2 - Bild 5
|

02.08-2 Pelletpresse 2 - Bild 6
|

02.09 Foerderband - Bild 1
|

02.09 Foerderband - Bild 2
|

02.10 Foerderband
|

02.11 Pelletkuehler - Bild 1
|

02.11 Pelletkuehler - Bild 2
|

02.11 Pelletkuehler - Bild 3
|

02.11 Pelletkuehler - Bild 4
|

02.12 Rotationssieb - Bild 1
|

02.12 Rotationssieb - Bild 2
|

02.12 Rotationssieb - Bild 3
|

02.13 Foerderband - Bild 1
|

02.13 Foerderband - Bild 2
|

02.14 Foerderband
|

02.15 Pelletcyklon zur Entstaubung
|

02.16 Ventilator
|

02.xx Anlagensteuerung - Bild 1
|

02.xx Anlagensteuerung - Bild 2
|

02.xx Anlagensteuerung - Bild 3
|

02.xx Anlagensteuerung - Bild 4
|

03.01 Zwischenpuffer 1 - Bild 1
|

03.01 Zwischenpuffer 1 - Bild 2
|

03.01 Zwischenpuffer 1 - Bild 3
|

03.02 Zwischenpuffer 2
|

03.03 Zwischenpuffer 3
|

03.04-1 Foerderband fuer Aussenverladung
|

03.04-2 Scharnierband fuer Aussenverladung
|

03.05 Scharnierband zur Absackung
|

03.06 Absackanlage - Bild 1
|

03.06 Absackanlage - Bild 2
|

03.06 Absackanlage - Bild 3
|

03.06 Absackanlage - Bild 4
|

03.06 Absackanlage - Bild 5
|

03.06 Absackanlage - Bild 6
|